Waterproofing
Uncoupling Membrane
Waterproofing
Uncoupling Membrane
Details
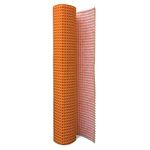
- Thickness: 1/8 inch
- Use: Tile underlayment & waterproofing
- Material: Waterproof polyethylene with fleece backing
- For: Floors, Walls, and Shower Areas
- Compatible With: Ceramic, porcelain, stone tiles
Price: —
Features
- Waterproof Barrier:Blocks moisture from reaching subfloors, preventing mold and structural damage.
- Crack Isolation:Absorbs movement from the substrate to prevent tile cracks and grout failures.
- Lightweight & Easy to Cut:Installs quickly with minimal effort, perfect for DIY or professional use.
- Vapor Management Channels:Allows moisture to dissipate effectively beneath the tile layer.
- Universal Compatibility:Works with ceramic, porcelain, and stone tiles on both floor and wall applications.
- Premium Durability:Resistant to aging, rot, and temperature changes built to last for decades.
- Stress Absorption Layer:Prevents cracks caused by foundation shifts, expansion, and contraction - keeping tile surfaces intact for decades.
Homenomics Uncoupling Membrane
Tile Underlayment | Waterproof | Crack-Isolation | 1/8" Thick
Protect your floors from cracks and water damage.
A professional grade uncoupling membrane engineered to stop tile cracking, block moisture, and extend the life of your floor. Perfect for bathrooms, kitchens, and showers easy for DIY or pro installs.
- Prepare the Surface
Make sure the subfloor is clean, dry, and level. Remove any dust, oil, paint, or debris that might prevent bonding. If the floor is uneven, use a leveling compound and allow it to fully cure before proceeding.
- Make Your Cuts
Lay out the Homenomics Uncoupling Membrane and make all necessary measurements and cuts before applying a thin-set. This ensures the mortar's moisture does not evaporate prematurely and stays workable within the manufacturer's time limits.
- Mix and Apply the Thin-Set
Mix the thin-set mortar with the exact amount of water specified by the manufacturer until you achieve a peanut butter–like consistency. We recommend using a ⅛" to ¼" V-notched trowel for the best spread, although square-notched trowels are also acceptable. Spread the thin-set evenly over the entire area where the membrane will be installed.
Use the appropriate thin-set for your subfloor:
- Concrete subfloors: Unmodified thin-set mortar
- Plywood or OSB subfloors: Modified thin-set mortar
- Gypsum, radiant heat, or leveling compounds: Modified thin-set mortar
- Install the Membrane
Press the membrane fleece side down into the freshly applied mortar. Using the flat side of your trowel, work from the center outward to press the membrane firmly into place and eliminate air pockets. Ensure each section of membrane does not overlap pieces should be abutted edge to edge.
- Waterproofing
*these steps are required for waterproofing only*
If you are joining two separate cuts of membrane or where the Homenomics Uncoupling Membrane meets a wall, we highly recommend using the Homenomics Waterproofing Joint Band to maintain full waterproofing throughout the system.
- Where two pieces of membrane meet, apply a layer of unmodified thin-set mortar over the seam.
- Embed the Homenomics Membrane Homenomics Waterproofing Joint Band into the mortar, ensuring at least a 2-inch overlap on both sides.
- Press the seam tape firmly with the flat side of your trowel to remove any excess mortar or trapped air bubbles.
- Ensure all floor penetrations (such as plumbing pipes) are also sealed for a watertight installation.
- Install Tile
Apply a layer of unmodified thin-set mortar on top of the membrane, using the appropriate trowel size for your tile. Lay your tiles firmly into place, maintaining consistent grout spacing. Allow the mortar to cure per the manufacturer's recommendations before grouting.